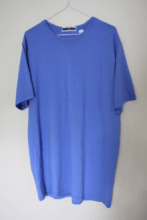
Take in sides of tee shirt - Mary wrote "I have several nice t-shirts that I bought just last year and now they are too big. I've lost some weight and I think they have also stretched. I am looking for the easiest way to make the body of the shirts smaller."
Most tee shirts have two side seams which is the easiest place to take it in. You may come across the occasional tee shirt that does not have side seams. In this case, just create the side seam by ironing the sides flat with the exact sides ironed from under the arm and down to the hem line.
Tee shirts are not usually fitted snugly to the body, however you should always pin both sides of the tee whilst it is on your body, so that you know how much to take in.
Before you pin the sides have a look to see if the sleeve head is too low. Some tees are designed with a drop shoulder, however if the tee is too big, it may be too much of a drop........... Fold the sleeve back up and onto the shoulder. It should be in line with the edge of the shoulder.
When you are pinning, try and pin the same amount on both sides. When you pin under the arm or in areas where the person is likely to bend or twist, like the underarm, be careful to have the pin ends facing away from the underarm. That means at the underarm, the pin heads will be touching because one pin will go one way and the other pin will go the other way.
If you are going to wear a bra with the tee shirt, then put the bra on before you pin. Whenever you pin a garment on a person, always make sure they have the same lingerie on their will be wearing with the garment. This particularly applies when pinning a gown or wedding dress.
If you have a friend who can help you, get them to pin down the sides the same amount. For example if they are too big by say 2.5 cm (1") with the seam folded in the middle, then pin the opposite side the same amount. Pin the sleeves if they are too wide working down the underarm and all the way to the end of the sleeve.
Draw a stick figure of the tee and measure from the seam to the pin and write this measurement down all the way from the sleeve to the hem taking a measurement every 5 cm (2") or so.
If you are raising the sleeve, place a pin on the edge of the folded sleeve to indicate where you are raising it too. This means the new pin is next to the pin holding the sleeve up onto the shoulder. Pull the pins out that are holding the sleeve up and the newly placed pins will show you how you should reshape the armhole seam.
Draw an arch for the armhole and a line at the top which represents the shoulder seam, and put Front at the front of the shoulder seam and back for the back of the shoulder seam. Then measure from the shoulder seam where the sleeve is attached up to the pin and write this measurement on your stick drawing. Measure down 5 cm (2") at the front and write this measurement down. Do the same every 5 cm (2") front and back.
Once you have all your measurement, either unpick the sleeve, or cut off. Being a tee, it is usually only sewn on with an overlocking thread and it will not make a big difference by cutting it off. If you do cut, then make an adjustment with your measurements on the shoulder. For example if you were raising the sleeve by 5 cm (2") and you have cut .5 cm (1/4") from the sleeve and the shoulder, then reduce the amount by this.
Tip - BEFORE YOU CUT OR UNPICK - Pin a piece of fabric to each sleeve with the words "Right" on the right sleeve and "Left" on the left sleeve. This way when you detach the sleeves, you know which one goes where.
Turn the tee inside out and place dots at your measurements. Re cut your armhole and pin your sleeve back on starting from the top shoulder seam pinning it down one side and then down the other side. The sleeve will be smaller, and it will not reach the underarm seam of the body of the tee. DO NOT PULL IT OR TRY AND STRETCH IT INTO PLACE.
Mark the body of the garment on the wrong side. It should be about the same as the sleeve now under the arm.
Sew through the dots on the body of the garment and overlock the excess off or cut away the excess and bind the sides.
Pin the balance of the sleeve on and see if you need to take any out of the sleeve width. By raising the sleeve you will have altered the amount you need to take in slightly.
I would not zigzag the sides because it would make the tee stretch more.
Use a stretch needle when sewing and I use my buttonhole foot to sew stretch fabric, although it depends on what your buttonhole foot is like. Mine is plastic and grips the fabric well.
TIP - If you did not shorten the hem, then in this instance you may want to sew through to the fold. I don't like doing that, but for a tee I would consider it. Make sure the ends are the same and after you overlock, stitching the seam flat.
Happy sewing
Judith Turner

