Sewing to a fold - What does this mean?
 Let me take you back to my shop days. From the first day I was busy. It might have been the location, but I do prefer to think it was the quality of my workmanship. The word spread into the community, which was fantastic. The down side! I was so busy that before too long I became so exhausted it was an effort to get up in the morning. That meant getting help. But how do I ensure the work standard is maintained?
When I began training new staff, one of the statements I made day in and day out was, "NEVER SEW TO A FOLD" (unless it is absolutely necessary). There will be times when there is no option, however, most of the time it requires a few minutes of unpicking to achieve the best result.
Take a look at these photos. I have sewn in orange so that you can see what I mean. For the sake of this exercise let us say that the sides are being taken in and it includes the hem. In this example the hem has been over locked and double stitched. Whilst this example is based upon a machine stitched hem, if the garment has cover stitch, I would unpick the cover stitch, and once taken in, overlock and re stitch, or re cover stitch.
[/fusion_builder_column]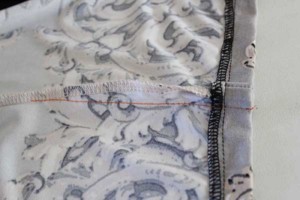
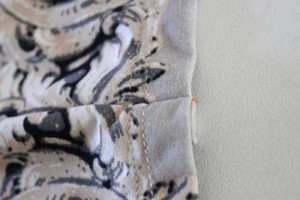
PROFESSIONAL FINISH - This will take a little longer to achieve. Unpick the stitched hem - a little further either side to allow for the hem to be lowered so that there is easy access when sewing the new seam. If there is a slight flare or taper, make sure to do the same from the hem line. In other words if it is tapered in, then taper out the same distance from the hem allowance. If it is flared, then flare outwards from the hem line.
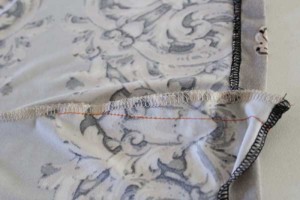

Compare the two styles. The first is straight through and the last has been opened out, stitched through to the raw edge and folded back.
For those who want to alter with the least amount of time and effort, the Quick Option would see that happen. However, there is a downside to the Quick Option, particularly when it comes to necklines and armholes. Next month we will look at what to do when shortening the shoulders and how to resolve the neckline differences.
Happy altering
Judith Turner
[/fusion_builder_row][/fusion_builder_container]